
Transform your living space without draining your bank account or hiring professionals. Start with small-scale projects that deliver maximum visual impact—swap outdated cabinet hardware, create a gallery wall using thrifted frames, or refresh tired furniture with a coat of chalk paint. These beginner-friendly updates typically cost under $50 and take just a weekend to complete.
The beauty of DIY home decor lies in customization. Unlike mass-produced items from big-box stores, your handmade pieces reflect your personality and fit your exact specifications. Whether you’re working with a studio apartment or a sprawling family home, you can create magazine-worthy spaces using basic tools, affordable materials, and a bit of creative confidence.
Room-by-room transformations become manageable when you focus on one project at a time. Your living room might need new throw pillows sewn from fabric remnants, while your bedroom could benefit from a handmade headboard crafted from reclaimed wood. Kitchens shine with open shelving installations, and bathrooms feel spa-like with DIY storage solutions made from repurposed crates or baskets.
Success doesn’t require advanced carpentry skills or expensive equipment. Most projects need nothing more than a drill, paintbrushes, measuring tape, and patience. The real investment is your willingness to experiment, learn from mistakes, and celebrate small victories. Each completed project builds your confidence for tackling slightly more ambitious updates, gradually transforming your house into a home that tells your unique story without the designer price tag.
Why DIY Home Decor Works for Every Budget and Skill Level
Here’s a truth that might surprise you: you don’t need a hefty bank account or design degree to transform your space into something you absolutely love. DIY home decor works beautifully for everyone because it meets you exactly where you are, whether that’s working with a shoestring budget or having zero experience with power tools.
The financial benefits alone make DIY projects worth exploring. Store-bought decor often carries markup prices that can strain any budget, but when you create pieces yourself, you’re only paying for materials. A canvas print that costs $200 in stores? You can recreate something similar for under $30. Those trendy floating shelves? Try $15 in lumber versus $150 ready-made. Your dollar stretches remarkably further when you’re the creator.
Beyond savings, there’s something deeply personal about crafting your own decor. You’re not settling for mass-produced items that appear in countless homes. Instead, you’re choosing colors that speak to you, dimensions that fit your exact space, and styles that reflect your unique personality. That hand-painted vase becomes a conversation piece because it carries your creative fingerprint.
Now, let’s address the elephant in the room: “But I’m not crafty!” This fear stops so many people before they even start. The reality? Most DIY projects require nothing more than patience and willingness to learn. Start with no-sew pillow covers or painted terracotta pots. These beginner-friendly projects build confidence without demanding advanced skills. You’ll be amazed how quickly simple projects lead to more ambitious ones.
The satisfaction of stepping back and thinking “I made that” is genuinely priceless. It transforms your relationship with your space from passive inhabitant to active creator.
Essential Tools and Materials Every DIY Decorator Needs
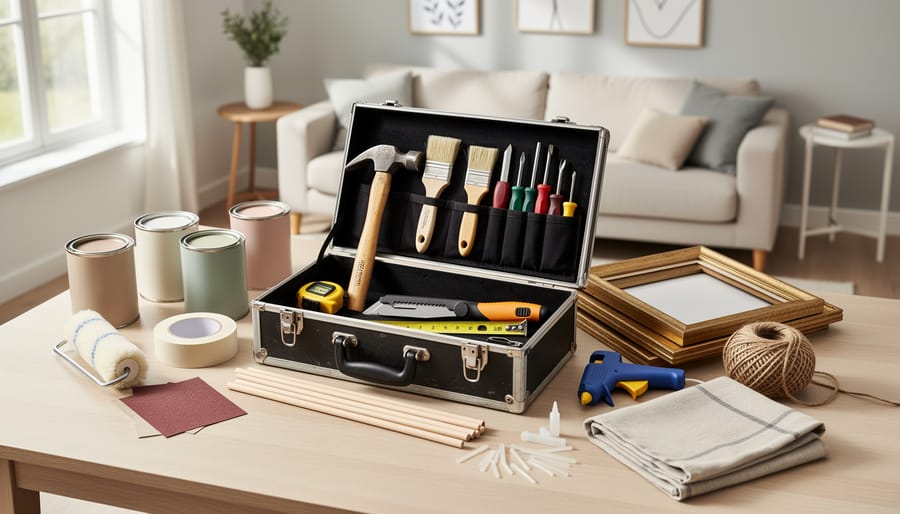
You don’t need a garage full of equipment to start transforming your space. Think of your toolkit as a small but mighty collection that grows naturally with each project you tackle.
Start with the foundation: a quality glue gun, which you’ll use for everything from hanging wall art to creating floral arrangements. Add sharp scissors, a measuring tape, and a basic paintbrush set. These four items alone unlock dozens of projects. A cordless drill might seem intimidating, but it’s incredibly user-friendly and opens up endless possibilities for hanging shelves and installing curtain rods.
For materials, keep a running collection of basics: white acrylic paint (easily tinted with craft paint), sandpaper in various grits, wood glue, and picture-hanging strips. Mason jars, picture frames from thrift stores, and fabric remnants become your creative playground.
Shopping smart makes all the difference. Visit dollar stores for vases, frames, and craft supplies. Home improvement stores often have discount bins filled with paint samples and wood scraps perfect for small projects. Estate sales and Facebook Marketplace are goldmines for materials at fraction of retail costs. Many craft stores offer weekly coupons, sometimes 40-50% off single items.
Store everything in a clear plastic bin so you can see your supplies at a glance. This simple organization system helps you recognize when inspiration strikes and you already have what you need. Remember, professional decorators didn’t start with fully stocked workshops either. They built their collections one project at a time, just like you will.
Living Room Projects That Make a Big Impact
Create a Statement Wall With Removable Wallpaper or Paint Techniques
A statement wall transforms any room into a personal gallery without overwhelming your entire space. If you’re renting or simply commitment-shy, removable wallpaper has become a game-changer—it peels off cleanly when you’re ready for a change, leaving no damage behind.
Start by choosing your focal wall, typically the one you see first when entering the room or behind a bed or sofa. For color selection, consider the mood you want to create: deep navy or forest green adds drama and sophistication, while soft blush or sage brings calm energy. Test paint samples or order wallpaper swatches first—colors look dramatically different in your specific lighting.
For patterns, beginners should start with geometric designs or subtle textures that hide minor application imperfections. Bold florals or murals work beautifully but require careful alignment.
If painting, try accessible techniques like color blocking with painter’s tape, creating an ombre effect by gradually lightening paint as you move up the wall, or using a sponge for texture. Work in natural light and take breaks to step back and assess your progress.
The beauty of this project is its reversibility—you can always repaint or remove wallpaper if your style evolves, making it perfect for experimenting with bold choices you might otherwise avoid.
Build Custom Shelving From Reclaimed Wood
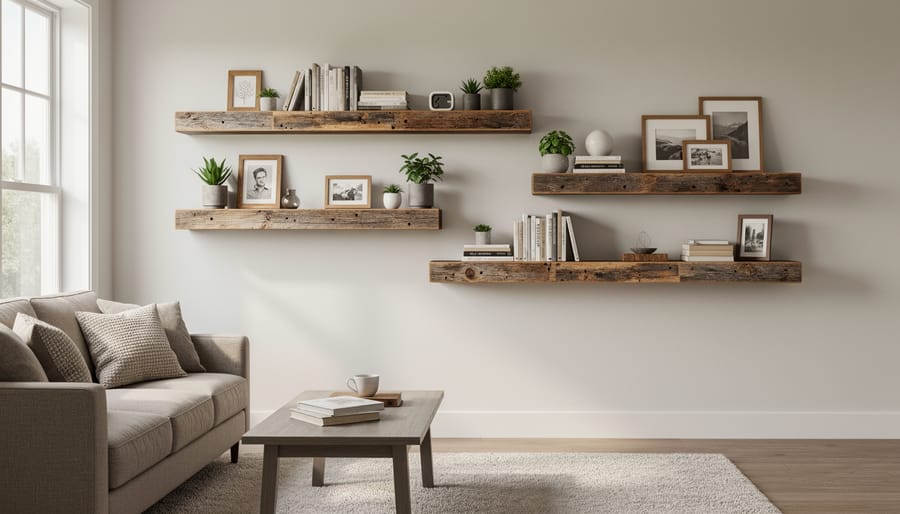
Reclaimed wood brings instant character to any space, and transforming it into custom shelving is easier than you might think. You’re creating something truly unique while giving old materials new life—a win for your home and the environment.
Start by sourcing your wood from local salvage yards, Habitat for Humanity ReStores, or even old pallets (just ensure they’re heat-treated, marked HT, and haven’t carried hazardous materials). Barn wood, fence boards, and discarded construction lumber often cost little to nothing and come with beautiful weathered textures.
For simple floating shelves, cut your reclaimed boards to your desired length—anywhere from 24 to 48 inches works well for most spaces. Sand rough edges while preserving the wood’s natural patina. Install heavy-duty floating shelf brackets into wall studs, then slide your boards over them. No complicated carpentry skills needed.
Ladder shelves offer another approachable option. Lean two vertical boards against your wall at an angle, then attach horizontal shelf boards at intervals using basic wood screws. This freestanding design requires no wall mounting and can easily move from room to room.
The imperfections in reclaimed wood—knots, nail holes, varied coloring—create that coveted rustic aesthetic that feels personal and collected rather than store-bought. Each piece tells a story.
Transform Thrift Store Finds Into Designer-Looking Pieces
That outdated dresser collecting dust at your local thrift store could be your next showstopping piece. The secret to transforming second-hand finds into designer-looking decor lies in three simple techniques that anyone can master.
Start with paint, your most powerful tool for transformation. Clean your piece thoroughly, then apply a coat of primer before using chalk paint or spray paint in trending colors like sage green or warm terracotta. For an elevated look, try a two-tone effect by painting the body one color and drawer fronts another.
Reupholstering breathes new life into tired chairs and benches. Begin with simple projects like dining chair seats, which only require a screwdriver, fabric, and a staple gun. Remove the seat, lay your fabric face-down, center the cushion on top, pull the fabric tight, and staple it underneath. Start at the center of each side and work outward for professional-looking results.
The finishing touches matter most. Replace basic hardware with brass or leather pulls, add decorative trim to plain lampshades, or distress painted edges with sandpaper for vintage charm. These small details create that high-end aesthetic that makes guests ask where you shopped, not what you spent.
Bedroom Refresh Projects for Better Rest and Relaxation
Make Your Own Upholstered Headboard
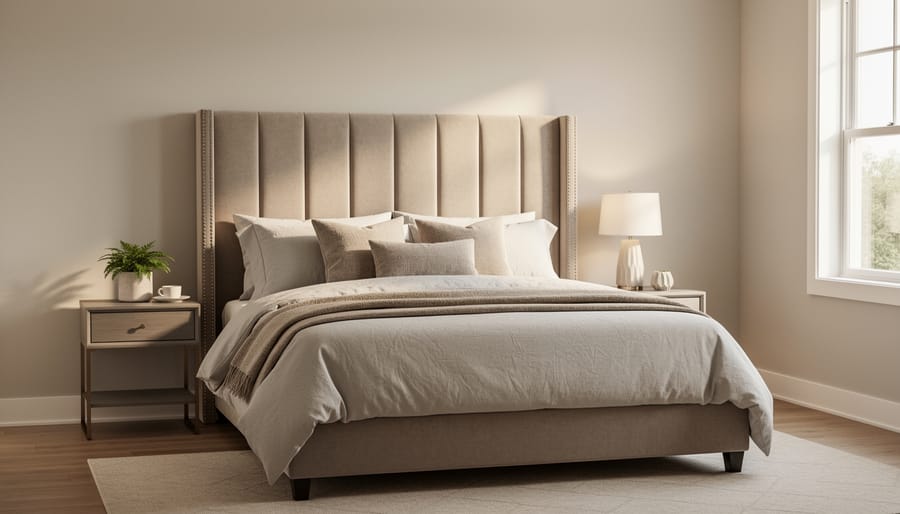
Transform your bedroom without the hefty price tag by creating a plush upholstered headboard that looks professionally designed. This project requires minimal carpentry skills and delivers maximum visual impact.
Start with a piece of plywood cut to your desired dimensions (twin, full, or king). Most hardware stores will cut this for you at no extra charge. Next, layer two-inch foam padding over the plywood, securing it with spray adhesive. Choose a durable upholstery fabric that complements your bedroom palette. Consider velvet for luxury, linen for a relaxed vibe, or patterned fabric to make a statement.
Wrap the fabric around the foam and board tightly, pulling it to the back and securing with a staple gun. Work from the center outward on each side to avoid wrinkles. For mounting, attach D-rings to the back and hang directly on the wall, or add wooden legs for a freestanding option.
Budget breakdown: Plywood costs approximately 30 to 50 dollars, foam padding runs 25 to 40 dollars, fabric averages 40 to 80 dollars depending on quality, and supplies like adhesive and staples total about 20 dollars. Your custom headboard comes together for 115 to 190 dollars, compared to 400 or more for store-bought versions.
DIY Bedside Tables and Lighting Solutions
Your bedroom deserves that cozy, put-together look without the hefty furniture store price tag. Let’s transform basic materials into charming bedside tables and ambient lighting that’ll make your space feel like a boutique hotel retreat.
Wooden crates make surprisingly stylish nightstands with zero carpentry skills required. Simply flip a sturdy crate on its side, sand any rough edges, and you’ve got instant storage with character. Stack two crates for added height, or leave one freestanding for a minimalist vibe. A coat of paint in your favorite color personalizes the piece, while leaving the wood natural creates that sought-after rustic charm. The open design gives you perfect spots for books, your phone charger, and a small plant.
For lighting, mason jars become enchanting bedside lamps with just a few supplies. Thread battery-operated fairy lights into a large mason jar for an instant glow that requires no electrical work. Worried about looking too country? Spray paint the jar lid in metallic gold or matte black for a modern twist. You can also wrap the jar’s exterior with twine or lace for added texture.
Another budget-friendly option: repurpose thrifted table lamps by switching out their shades. A plain lamp base gets instant personality with a fabric shade you’ve covered in leftover wallpaper or decorative contact paper. These simple swaps create custom bedroom furniture that looks intentional and expensive while keeping your wallet happy.
Kitchen and Dining Area Updates You Can Do in a Day
Open Shelving and Display Ideas
Open shelving transforms kitchens, bathrooms, and living spaces with minimal effort and maximum impact. If you’re starting small, simply removing cabinet doors creates instant openness. Unscrew the hinges, fill any visible holes with wood filler, and touch up with paint. This no-cost approach works beautifully in kitchens where you want to showcase pretty dishware or glassware.
For new shelving, floating shelves offer that coveted modern aesthetic. You’ll find affordable brackets at any home improvement store, and installation takes just an afternoon. Measure twice, use a level, and secure into wall studs for stability.
The real magic happens in the styling. Group items in odd numbers, mix heights and textures, and leave breathing room between objects. In kitchens, stack white dishes with wooden cutting boards and potted herbs. Bathroom shelves shine with rolled towels, glass jars filled with cotton balls, and small plants.
Remember the balance between function and beauty. Keep everyday items within easy reach on lower shelves, and reserve higher spots for decorative pieces. This approach keeps your space practical while maintaining that airy, curated look you’re after. Start with one small area to build confidence before tackling larger projects.
Custom Centerpieces and Table Decor
Transform your dining or coffee table into a statement piece with centerpieces you can create in under an hour. Start with what you already have—a wooden bowl, glass vase, or even a vintage baking dish can become the foundation for beautiful displays.
For year-round appeal, fill shallow bowls with river rocks, succulents, and a single pillar candle. This minimal look works in any season and costs just a few dollars if you gather stones from nature walks. During fall, swap in pinecones, mini pumpkins, and cinnamon sticks for instant warmth and a wonderful scent.
Mason jars and tin cans become charming candle holders when wrapped with twine, lace, or fabric scraps. Group three or five containers together in varying heights for visual interest—odd numbers always look more natural to the eye.
Try floating candles in a wide glass bowl surrounded by seasonal elements like cranberries in winter, citrus slices in summer, or flower petals in spring. Wine bottles make excellent taper candle holders once you remove the labels, and vintage teacups can cradle tea lights for an elegant touch.
The beauty of table decor lies in switching elements seasonally while keeping your base containers. This approach saves money and storage space while keeping your home feeling fresh.
Wall Art and Textile Projects That Add Personality
Frame-Worthy Art From Unexpected Materials
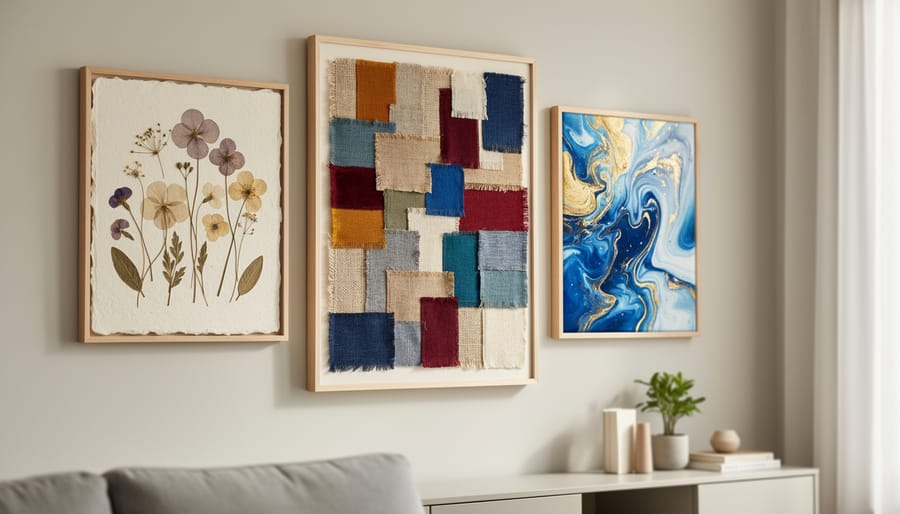
You don’t need expensive prints when you can create stunning wall art from materials you already have at home. Fabric scraps make gorgeous abstract pieces when stretched over canvas boards or tucked into embroidery hoops. Try layering different textures and patterns for a dimensional look that adds personality to any room.
Pressed flowers offer timeless elegance and couldn’t be easier to create. Place blooms between heavy books for two weeks, then arrange them on cardstock or watercolor paper. This works beautifully with flowers from your garden or that bouquet you couldn’t bear to throw away.
Magazine pages provide bold, colorful art perfect for modern spaces. Cut out interesting images, text, or patterns and create collages that reflect your interests. Fashion magazines work especially well for chic, editorial-style pieces.
Abstract paint pours deliver professional-looking results with minimal skill required. Simply mix acrylic paints with pouring medium, tilt your canvas, and let gravity create organic patterns. The unpredictability makes each piece truly one-of-a-kind.
When framing your creations, thrift stores offer affordable options you can paint or refinish. Standard sizes like 8×10 or 11×14 keep costs down, while mismatched vintage frames grouped together create an eclectic gallery wall that feels intentionally curated rather than budget-conscious.
Throw Pillows and Curtains You Can Sew (or No-Sew)
Textiles instantly transform a room’s atmosphere, and you don’t need advanced sewing skills to create beautiful throw pillows and curtains. For a no-sew approach, fabric glue or iron-on hem tape works wonderfully for simple curtain panels. Just measure your window, cut your fabric to size, and create clean edges with these handy supplies. Envelope-style pillow covers require only three straight seams if you have a sewing machine, making them perfect for beginners.
When selecting fabrics, think about creating a cohesive story throughout your space. Choose a main pattern you love, then add two coordinating solids and perhaps one smaller-scale print. This formula prevents your room from feeling chaotic while adding visual interest. Cotton and linen are forgiving fabrics that iron easily and handle well for first-time sewers.
Consider mixing textures too. A velvet pillow paired with a nubby linen creates depth that catches the eye. Visit fabric stores during sale events, where remnants often cost just a few dollars per yard. You can create four standard throw pillow covers and a simple curtain panel for under fifty dollars, giving your space a custom designer look without the hefty price tag.
How to Actually Finish Your DIY Projects
The secret to finishing DIY projects isn’t superhuman motivation or endless free time. It’s about setting yourself up for success from the very beginning.
Start by choosing projects that genuinely excite you, not just what’s trending on social media. When you’re emotionally invested in transforming that blank wall or updating those tired curtains, you’re much more likely to push through the challenging moments. Ask yourself: Will this project make me smile every time I walk into the room? If the answer isn’t an enthusiastic yes, save it for another day.
Break your project into tiny, manageable chunks. Instead of telling yourself you’ll “finish the gallery wall this weekend,” commit to specific mini-goals: Saturday morning, measure and mark the layout. Saturday afternoon, hang three frames. Sunday, complete the remaining pieces. This approach feels less overwhelming and gives you multiple opportunities to feel accomplished along the way.
Time blocking is your best friend when juggling real-life responsibilities. Schedule your DIY sessions like actual appointments. Even 30-minute blocks add up surprisingly fast. A coat of paint here, some drilling there, and suddenly you’re making real progress without sacrificing your entire weekend.
Keep all your supplies visible and organized in one dedicated spot. Nothing kills momentum faster than spending 20 minutes hunting for that paintbrush or sandpaper you swore you had somewhere. Use a plastic bin or designated shelf where everything lives between work sessions.
Finally, embrace the imperfect finish. That picture frame sitting slightly off-center? Most guests will never notice. The hand-painted design with minor wobbles? It adds character and proves a real person made it. Done is better than perfect, and your completed project, quirks and all, will always beat the unfinished one gathering dust in your garage.
The beauty of DIY home decor is that it’s truly for everyone, regardless of your experience level or budget. You don’t need to be a master craftsperson or have a garage full of tools to transform your space into something that feels authentically yours. Start small—maybe it’s a single painted accent wall, a simple macramé plant hanger, or a refreshed picture frame arrangement. What matters most isn’t perfection, but the personal touches you bring to your environment.
Every project you complete builds your confidence and skills for the next one. You’ll discover that the process itself becomes part of the joy, from that first brush stroke to stepping back and admiring your handiwork. Your home is a living reflection of your journey, tastes, and creativity, and there’s something profoundly satisfying about knowing you made it with your own hands.
Ready to dive deeper into your creative journey? Explore our collection of DIY tutorials, budget-friendly tips, and inspiring home tours to keep your ideas flowing. Your dream space is waiting, one project at a time.