
Maintaining your house water filtration system takes 15 to 30 minutes every three to six months and requires nothing more than a replacement filter cartridge, a bucket, and a wrench. This routine care keeps your water clean, your system running efficiently, and prevents costly repairs down the line. Skip it, and you’ll notice reduced water pressure, strange tastes, and eventually, a failed system that costs hundreds to replace instead of the $30 to $80 you’d spend on regular filter changes.
Most homeowners treat their filtration systems like forgotten appliances tucked away in basements or utility closets, only remembering they exist when something goes wrong. But here’s what I learned from visiting Maria’s century-old farmhouse in Vermont last spring: she’d been drinking clean, great-tasting water for eight years from the same whole-house system simply because she marked filter changes on her kitchen calendar like any other household task. No mystery, no panic calls to plumbers, just a predictable 20-minute job twice a year.
The process is straightforward regardless of whether you have a basic sediment filter, a multi-stage system, or a reverse osmosis setup. You’ll shut off the water supply, release pressure, swap the old filter for a new one, check for leaks, and get back to your day. The specific steps vary slightly by system type, but the fundamentals remain consistent. What matters most is doing it regularly and knowing what to look for when something seems off.
This guide walks you through each maintenance task with clear instructions, safety checks, and troubleshooting tips for the most common issues.
What You’ll Need for Regular Water Filter Maintenance
Gathering your supplies ahead of time makes maintenance faster and prevents mid-job trips to the hardware store. Most homeowners can complete routine water filter maintenance with items already in their toolkit, though you’ll need to purchase replacement filters specific to your system model.
Essential Tools and Materials
- Replacement filter cartridges (check your system manual for correct model numbers)
- Filter housing wrench (often included with your system, or a universal filter wrench from hardware stores)
- Standard screwdriver set (flathead and Phillips)
- Adjustable wrench or pliers
- Large bucket or plastic tub to catch water
- Old towels or absorbent rags
- Nitrile gloves to keep hands clean
- Food-grade silicone lubricant for O-rings
- Mild bleach solution or filter housing cleaner
- Spray bottle for cleaning solution
For whole-house systems, you might also want a second pair of hands during filter changes, especially if your housings are mounted high or in tight spaces. Under-sink systems typically require less physical effort but may need a small flashlight to see connections in dark cabinet spaces.
System-specific items vary by manufacturer. Reverse osmosis systems need drain line fittings and sometimes a pressure tank gauge. UV purification units require replacement bulbs annually rather than filters. Check your owner’s manual for any specialized tools, and keep it handy during maintenance since torque specifications and filter orientation can differ between brands.
Before you start, verify you’re ordering the correct replacement filters. System model numbers are usually printed on a label near the main housing or in your installation paperwork. Using the wrong filter size wastes money and compromises water quality, so double-check dimensions and micron ratings against manufacturer specs.
Safety First: What to Check Before You Start
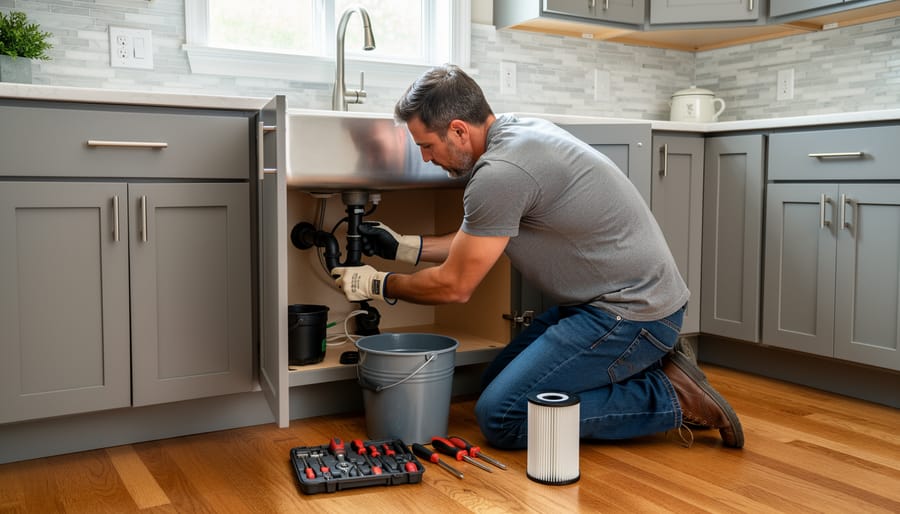
Before you touch any part of your house water filtration system, take a few minutes to protect yourself and your home. Skipping these safety checks can lead to water damage, contamination, or even injury.
Start by shutting off the main water supply to your filtration system. Most units have a dedicated shut-off valve on the incoming water line, turn it clockwise until it stops. Next, open a nearby faucet downstream from the filter to release built-up pressure in the lines. This prevents a sudden spray when you remove filter housings. Keep that faucet open throughout the maintenance process.
Lay down old towels or a shallow pan beneath the filter housings. Even after releasing pressure, residual water will drip out when you open the canisters. This simple step saves your floors and makes cleanup easier.
Check your system’s manual for any manufacturer-specific warnings before you begin. Some filters contain media that requires special handling, and certain high-capacity whole-house systems need professional servicing due to backwash complexity or pressure requirements.
If you discover cracked housings, persistent leaks you cannot trace, or if your system is still under warranty, stop and call a licensed plumber or the manufacturer’s service line. The same applies if you are uncomfortable working with your home’s main water supply. There is no shame in hiring a professional for a job that keeps your family’s drinking water safe.
Step-by-Step: How to Maintain Your House Water Filtration System
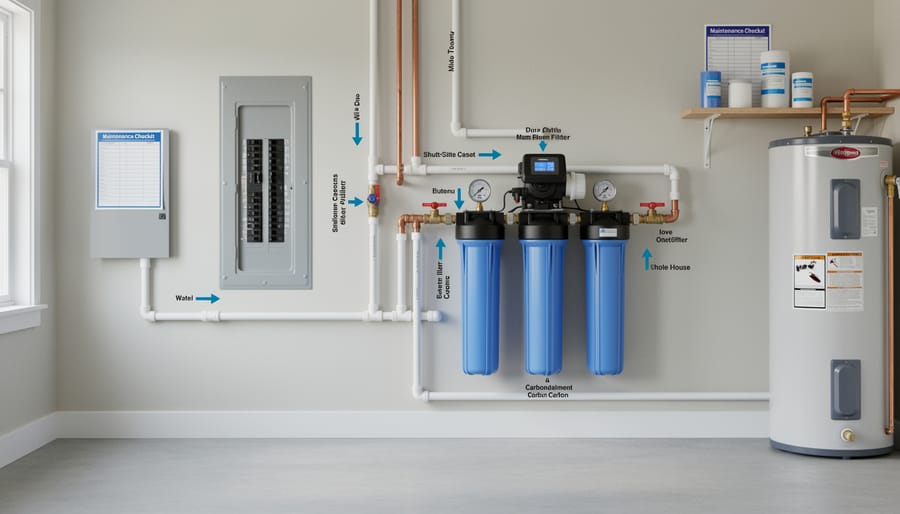
Step 1: Turn Off Water and Release Pressure
Before you touch anything, you need to shut down your filtration system safely. Start by turning off the main water supply to the filter, most systems have a dedicated shut-off valve on the incoming water line, usually located near the filter unit itself. If you can’t find one, you’ll need to shut off the main water valve for your entire house.
Once the water is off, release the pressure trapped inside the filter housing. Find the pressure release button on top of the unit and press it, or slowly crack open the filter housing cap a quarter turn while holding a towel underneath. You’ll hear air hissing out as the pressure escapes. This step prevents water from spraying everywhere when you unscrew the housing completely.
Turn on a nearby faucet downstream from the filter to help drain any remaining water in the lines. Let it run until the flow stops completely. Now your system is depressurized and safe to work on without making a mess or risking injury from sudden water release.
Step 2: Remove and Inspect Filter Cartridges
With the pressure released, unscrew the filter housing using your filter wrench. Turn counterclockwise and be ready, some trapped water will spill out even after depressurizing. Keep towels underneath to catch drips.
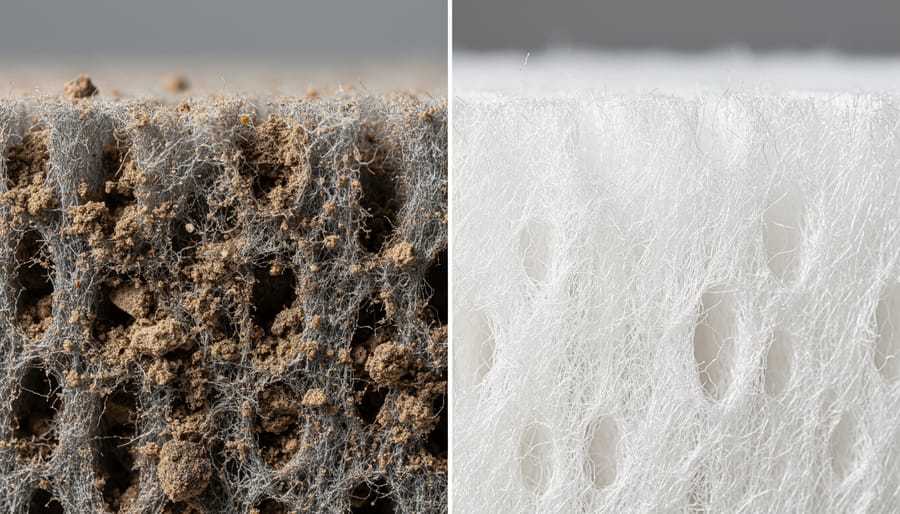
Lift out the old filter cartridge carefully. Don’t shake it vigorously or you’ll scatter sediment everywhere. Set it on a towel where you can examine it properly.
Look at what the filter caught. A brown or rust-colored cartridge that’s evenly dirty shows normal sediment capture. That’s good, your filter did its job. But watch for red flags: black or green slime suggests bacterial growth, heavy mineral crusting means hard water issues, and an oily film points to petroleum contamination. If you spot mold, unusual odors, or the filter disintegrated when you pulled it out, something’s wrong with your source water. Document what you see with a photo, it helps track changes over time.
Check the filter’s condition too. Cracks, splits, or a collapsed pleated surface mean it failed before its scheduled replacement date. That pattern tells you to shorten your maintenance intervals or investigate upstream problems.
Step 3: Clean Filter Housings and O-Rings
With the filter removed, grab a clean bucket and pour about half an inch of water mixed with a tablespoon of unscented dish soap into the empty housing. Use a soft brush or clean cloth to scrub the interior walls, paying extra attention to the threads where the cap screws on, sediment loves to hide there. Rinse thoroughly with clean water until no soap residue remains.
Next, inspect the black rubber O-ring that sits in the groove near the housing’s rim. Run your finger around it to feel for cracks, hardness, or flat spots. A healthy O-ring should feel pliable, not brittle. If it looks damaged or dried out, replace it now to avoid leaks. Even if it looks fine, wipe it clean and apply a thin coating of food-grade silicone grease, this keeps the seal flexible and makes the housing easier to open next time.
For systems that handle well water or areas with heavy mineral deposits, consider a diluted white vinegar soak (one part vinegar to three parts water) for stubborn scale buildup. Let it sit for ten minutes, then scrub and rinse well. Clean housings mean better flow and fewer leaks down the road.
Step 4: Install New Filter Cartridges
Installing new filters correctly prevents leaks and ensures your system works as intended. Start by unwrapping the replacement cartridge and removing any protective plastic, some filters arrive sealed in bags or with end caps.
Check the filter’s orientation. Many cartridges have directional arrows or “IN/OUT” markings molded into the plastic. Position it so water flows through in the right direction. If there’s no marking, it typically doesn’t matter for standard sediment or carbon block filters.
Before inserting the cartridge, make sure the O-ring inside the housing cap sits properly in its groove. It should lie flat, not twisted. If you applied lubricant during Step 3, this helps create a watertight seal.
Thread the housing onto the cap by hand first. Turn it clockwise slowly, feeling for smooth engagement. If it binds or feels rough, stop, you’re cross-threading. Back it out and start over. Cross-threading damages the plastic threads and causes leaks.
Once hand-tight, use your filter wrench to snug it another quarter-turn. You want firm contact, not Hulk-strength torque. Over-tightening can crack the housing or deform the O-ring, leading to drips. When you feel solid resistance, stop there.
Step 5: Flush the System
After installing new filters, you’ll need to flush the system to clear out carbon fines and manufacturing dust that can make your water look cloudy. This step is crucial for getting clean, clear water right away.
Turn on a cold water tap, preferably one close to your filtration system, and let it run at full flow. You’ll likely notice the water looks grayish or has tiny black particles at first. This is completely normal and exactly what you’re flushing out. Keep the water running for at least five minutes, though some manufacturers recommend ten minutes for larger whole-house systems.
Watch the water clarity improve as you flush. It should transition from cloudy to crystal clear. If you’re maintaining an under-sink water filter, you might want to fill a clear glass periodically to check the progress. The water should look completely transparent with no visible particles or cloudiness by the end.
Don’t skip this step or cut it short. Those carbon fines won’t harm you, but they’ll make your water look unappealing and can clog faucet aerators. If you have a whole-house water filtration system, flush multiple taps simultaneously to speed up the process. Once the water runs clear for a full minute, you’re ready for the final inspection. For more details on water filter replacement timing, mark your calendar for the next service.
Step 6: Check for Leaks and Restore Normal Operation
Turn the water supply back on slowly, listening for any unusual sounds as pressure builds. Before you walk away, run your hand along every connection point, filter housing seam, and valve junction. Even a tiny drop of moisture now can become a steady drip later, so check carefully. Look underneath the system for any water pooling on the floor or dripping down pipes.
Once you’ve confirmed everything is dry, open several faucets throughout your home to check water flow. Start with the closest fixture to your filtration system, then test a bathroom upstairs and a kitchen sink on the opposite end of the house. Water pressure should feel consistent and normal. If flow seems weak or sputtering, you may have trapped air in the lines, just let the water run for a minute or two until it stabilizes.
Return to the filtration system after about 15 minutes and recheck all connections. Sometimes a slow leak only appears once full pressure has been restored for a while. This final inspection ensures your maintenance work will hold up long after you’ve put away your tools.
How to Know Your Maintenance Worked (Plus Next Steps)
You’ll know your maintenance succeeded when your water pressure feels strong again and your drinking water tastes noticeably cleaner. Run a few faucets and check that flow is steady, not weak or sputtering. If you had chlorine taste or sediment issues before, those should be gone now.
Give your system 24 hours to settle in, then do a leak check. Look under sinks, around filter housings, and near the main unit for any moisture or drips. Check the floor beneath connections with a dry paper towel, if it comes up damp, you might need to tighten a housing or replace an O-ring. Most post-maintenance leaks show up in the first day, so catching them early prevents water damage.
Visual clarity matters too. Fill a clear glass and hold it up to light. Properly maintained filters produce water that looks crystal clear, not cloudy or tinted. If you see particles or discoloration after flushing, run water for another five minutes to clear residual carbon fines from new filters.
Document your maintenance in a simple log, date, which filters you changed, and any observations about wear patterns. This helps you spot trends, like filters clogging faster than expected, which might signal upstream water quality problems. Much like tracking home plant care schedules, keeping records prevents you from guessing when you last serviced the system.
Set phone calendar reminders now for your next maintenance. Most whole-house sediment filters need changing every three to six months, while carbon filters last six to twelve months. Well water systems often require more frequent service than municipal systems because of higher sediment loads.
If water pressure stays low or taste doesn’t improve after 24 hours, you might have installed a filter backward or forgotten to remove protective packaging from a new cartridge. Double-check installation orientation and repeat the flush cycle.
Real Home Example: Sarah’s Whole-House System Maintenance Routine
Sarah Chen’s century-old Craftsman in Portland’s Laurelhurst neighborhood runs on well water, which means her whole-house filtration system works overtime. “I learned early on that maintenance keeps our water soft and clean,” she says, showing me her basement setup next to the water heater.
Every three months, Sarah sets aside an hour on Saturday morning. She buys replacement sediment and carbon filters in bulk from a local plumbing supply warehouse, cutting her annual filter costs nearly in half compared to ordering single cartridges online. “It’s the same budget-friendly DIY approach I use for everything in this house,” she notes.
Her system sits in a tidy corner with a clipboard hanging nearby. The clipboard holds a simple maintenance log where she records each service date, which filters she replaced, and any observations about sediment color or buildup. “I noticed heavy orange sediment last spring, which tipped me off to iron bacteria in our well before it became a bigger problem,” Sarah explains.
She keeps a dedicated maintenance kit in a clear plastic bin: the filter wrench that came with her system, a roll of paper towels, an old beach towel for floor protection, and a small container of food-grade silicone lubricant for the O-rings. “Having everything in one place means I actually do it instead of putting it off.”
The routine pays off beyond clean drinking water. Sarah’s houseplants, including her extensive succulent collection by the south-facing windows, thrive on the succulent-friendly water free of chlorine and heavy minerals. “Our coffee tastes better, my skin feels less dry, and I haven’t replaced a faucet aerator in three years because there’s no mineral buildup.”
Common Questions About Water Filter Maintenance
How often should I change my water filters?
Most sediment and carbon filters need replacement every 3-6 months, while reverse osmosis membranes typically last 2-3 years. Your specific timeline depends on water quality and daily usage volume, well water with high sediment loads requires more frequent changes than treated municipal water.
Can I clean and reuse my old filters?
No, don’t attempt to clean and reuse disposable cartridge filters. Once carbon or sediment filters are saturated, washing them doesn’t restore their filtration capacity and can actually release trapped contaminants back into your water.
What if my water pressure drops after changing filters?
Low pressure after maintenance usually means a filter was installed backward, the housing wasn’t fully tightened, or you forgot to open a shut-off valve completely. Double-check that cartridges are oriented correctly and all valves are in the open position.
How do I know when filters are actually spent?
Watch for reduced water flow, changes in taste or smell, visible sediment in your water, or reaching the manufacturer’s recommended replacement interval. Some systems include indicator lights or pressure gauges that signal when service is due.
Do well water systems need different maintenance than city water systems?
Yes, well water typically contains more sediment, minerals, and bacteria, so filters clog faster and need changing more frequently. Plan on replacing sediment pre-filters every 1-3 months for well water versus 3-6 months for municipal supplies.
What should I budget annually for replacement filters?
Expect to spend around $100-300 per year for a basic whole-house system and $50-150 for under-sink units, depending on your water quality and filter types. Buying filters in bulk or setting up auto-delivery subscriptions can cut costs by 15-20 percent.
Regular DIY home maintenance builds confidence and saves money over time. If you notice persistent problems after following these troubleshooting steps, contact your system manufacturer’s customer service line. They can diagnose issues specific to your model and determine whether you need professional service or if a simple adjustment will solve the problem.
Maintaining your house water filtration system isn’t just doable, it’s one of the smartest investments you can make in your home’s long-term health. You’ve seen the six steps, gathered the tools, and now you know exactly how to keep your water clean and your equipment running efficiently. The hour or two you spend on quarterly maintenance pays dividends in lower repair costs, extended filter life, and the peace of mind that comes from knowing your family’s water is safe.
Set a reminder right now for your next filter change. Mark it in your calendar, snap a photo of today’s date on the filter housing, or tie it to a seasonal task you already do. Clean water touches every part of home life, from morning coffee to evening showers, just like freshening up spaces with thoughtful touches throughout your home. When you stay on top of this simple routine, you’re protecting both your investment and your family’s wellness for years to come.